John’s room work in progress #1
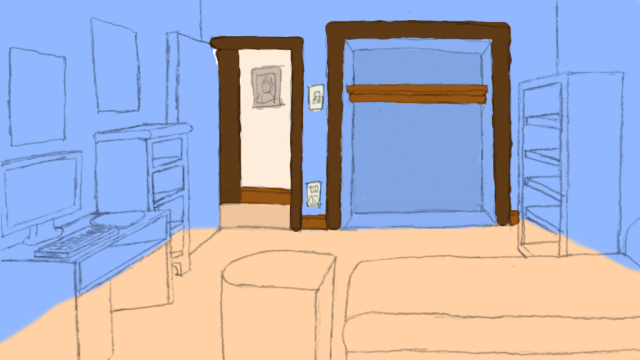
Okay I started a basic paintover, using the technique of putting the sketch on a layer above the painting using multiply which basically means the white shows through and i can paint under the sketch lines.
I just decided to do it to show a friend, but if you’re curious — this part isn’t even finished yet… But I will work on it until it’s perfect.
WIP 1
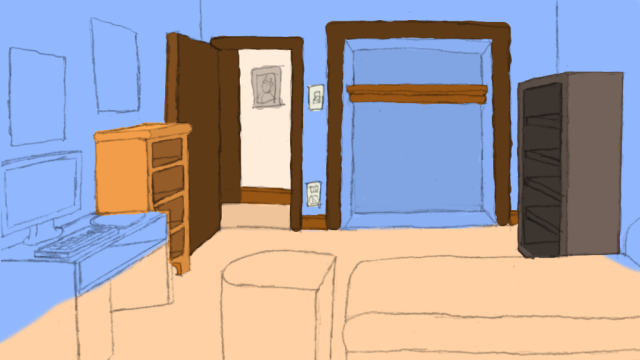
WIP 2
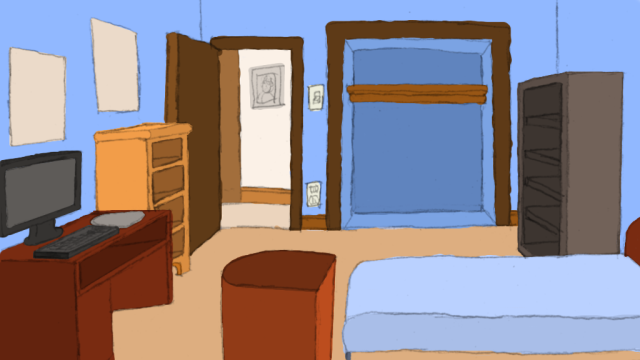
WIP 3
Actually the basic color blocking is generally complete until I get some feed back suggesting I change it before starting to apply shadows and so forth.
To make it less confusing, on the left side beside the computer desk is the dresser (it’s the sort of light brown one). Notice how it’s shelves are more holes than shelves, they come to the edge and are seperated by the front of the dresser. on the right side the gray thing is the bookcase, notice how the shelves are set in the case back from the edge. Someone in the ags forums critic’s lounge suggested I do this (maybe because of bad tangents or something) in any case I like it, it actually makes it look like a book case.
Basically this is the empty room before it gets all messy and the main character has to clean it up. that’s why there are no drawers in the dresser or books on the shelf.
The color choices are abit based on experience. the dresser is a lighter wood, to contrast with the dark wood of the door and the trim, the bookcase is gray just to make it a bit different. I made the desk something like mahogony or cherry, by adding a reddish tint, so that way it wasn’t completely brown. At one point in my life my walls were light blue with a light brown or tan floor (well the floor doesn’t look tan exactly but close enough). On the hole I think it’s decent. Note the dresser, bookcase, and door all have lighter tint on their sides, whereas the bed and the hamper and desk are darker on the sides facing the camera, not really sure if this is a good idea, but it makes me think that the foreground objects are closer to the camera, you can let me know if it isn’t right.
Let’s see… the hallway is on a single layer, the door is on it’s own layer, the trim around door and closet are in it’s own layer, trim around the bottom and outlet and switch are on it’s own (same) layer… I basically put alot of things in their own layers, such as the insides of the bookcase, dresser, and desk… and then some of the sides. the walls and the floor are the same as well… not really experienced with this software, using the gimp with a mouse but it seems to work. at one time i thought of actually putting every white/negative space (any space bordered with lines to form a shape) on a seperate layer, but that may be overkill.
In fact this may be overkill.
I’ll probably start working on the actual shading in a bit, the light is pretty much coming from the light bulb, that you can’t see in the picture… Any thoughts are appreciated, thanks!
Keith
April 30th, 2008 at 11:28 am
I found your blog via Google while searching for painting technique and your post regarding John’s room work in progress #1 looks very interesting to me. I could not believe the amount of quality material on this site. The site is extremely eyecatching and pulls the reader straight it, the articles are great quality and are very professionally written. I have seen too many of these sites where it looks like they pay an 8 year old to do the writing - Not this one. Your site is easily the best that I have seen in a long while.
Edit by administrator:
This comment looks to be possibly spam. The url is to a golf tips blog, and I don’t think anyone would call my blog “the best they’ve seen in a long while” — However on the off chance it isn’t spam, thanks for the comment.